Elevate Your Amigurumi Creations with French Knot Embroidery
I often suggest using embroidery to design my amigurumi. One of my favorite ways to add texture to amigurumi is with French knots. This embroidery may seem complicated, but it is actually simple.
Materials required:
- Your amigurumi;
- Scraps of yarn for embroidery (you may want to use embroidery thread);
- Sewing needles;
- Scissors;
- Pins;
Step-by-Step Guide
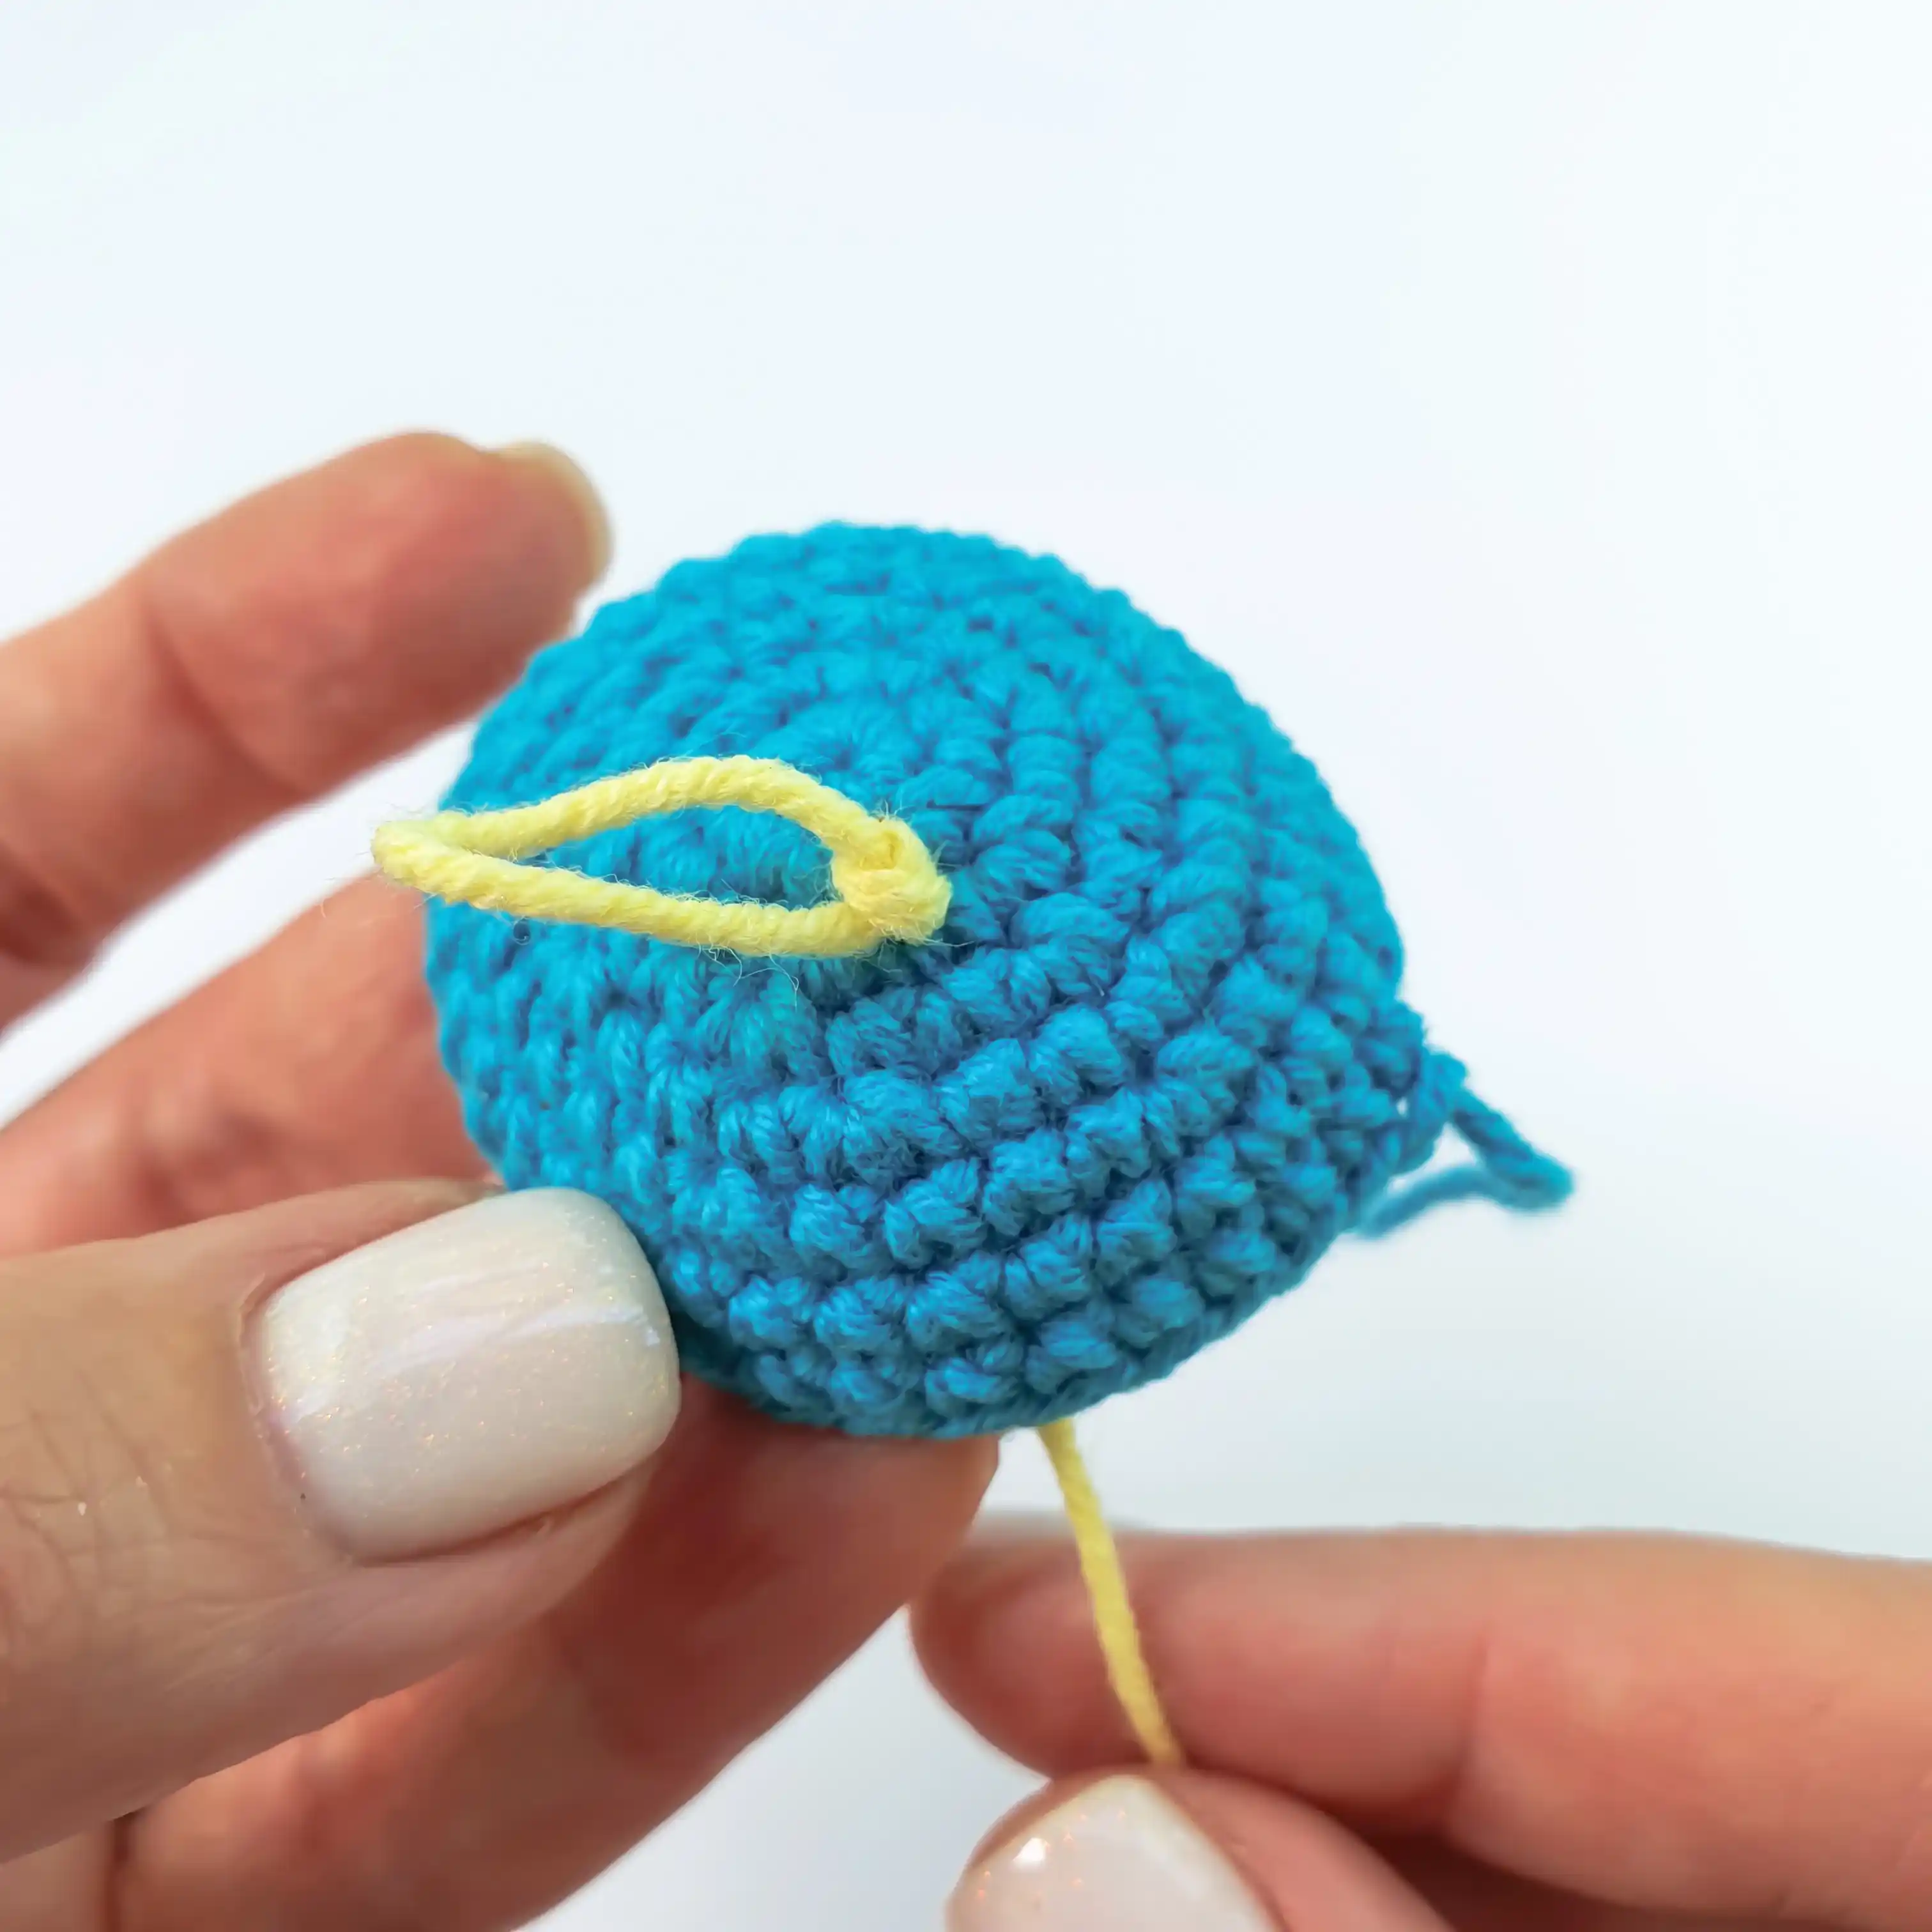
2. The yarn should be from the front side

3. Wrap the yarn around the needle three times. The size of the nodes depends on number of twists, experiment while embroidering.

4. Insert the needle near the place where the yarn comes out on the front side your work. Do not insert the needle into the same place as in this case, the yarn will go to the wrong side along with it.

5.Gently pull the yarn wrong side. At the same time, end of the thread opposite to the needle keep it taut. Hold the yarn until the length is there will be a couple of centimeters left. Then release it and gently pull it inside out.
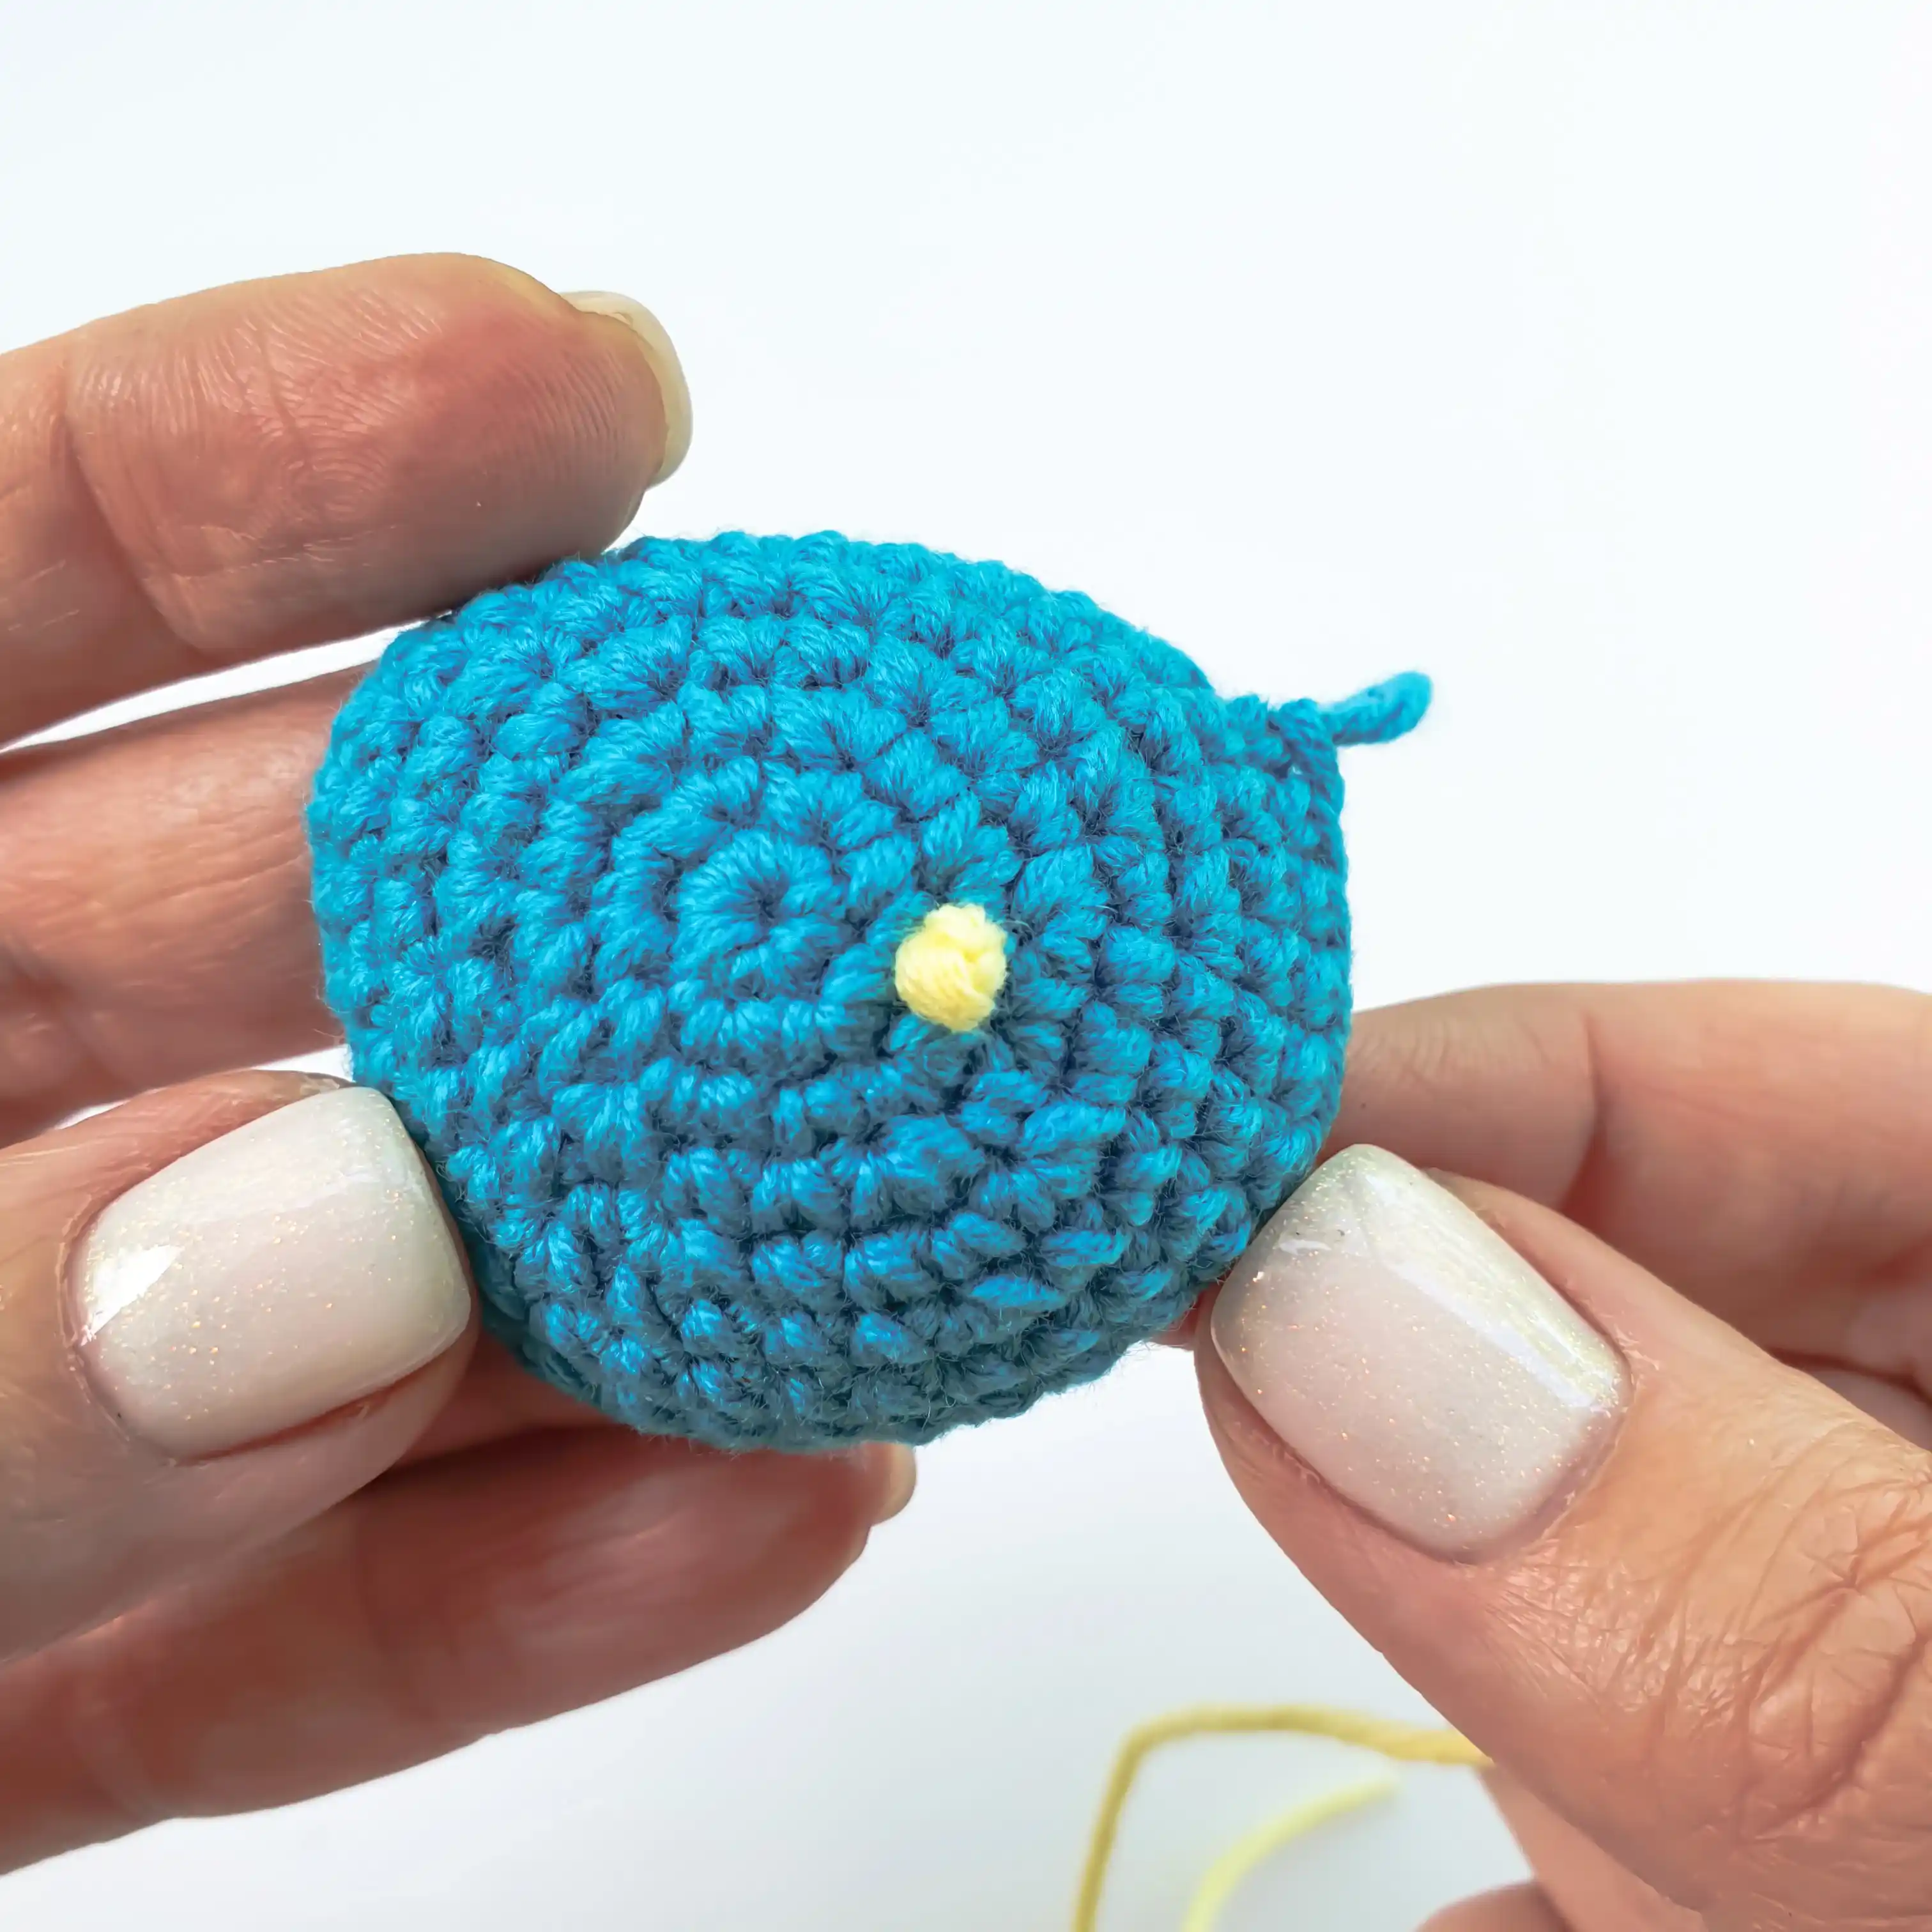
6. This way you should get smooth and beautiful French knots.
